4. Getting Started
You've downloaded the beta standalone Ksoloti Patcher here. Or maybe you've installed the Axoloti Patcher and set it up to use the ksoloti-legacy firmware. The Patcher has connected to your Ksoloti Core without troubles.
Let's assume you've already soldered on some jacks or wires to be able to hear your Ksoloti. But what now?
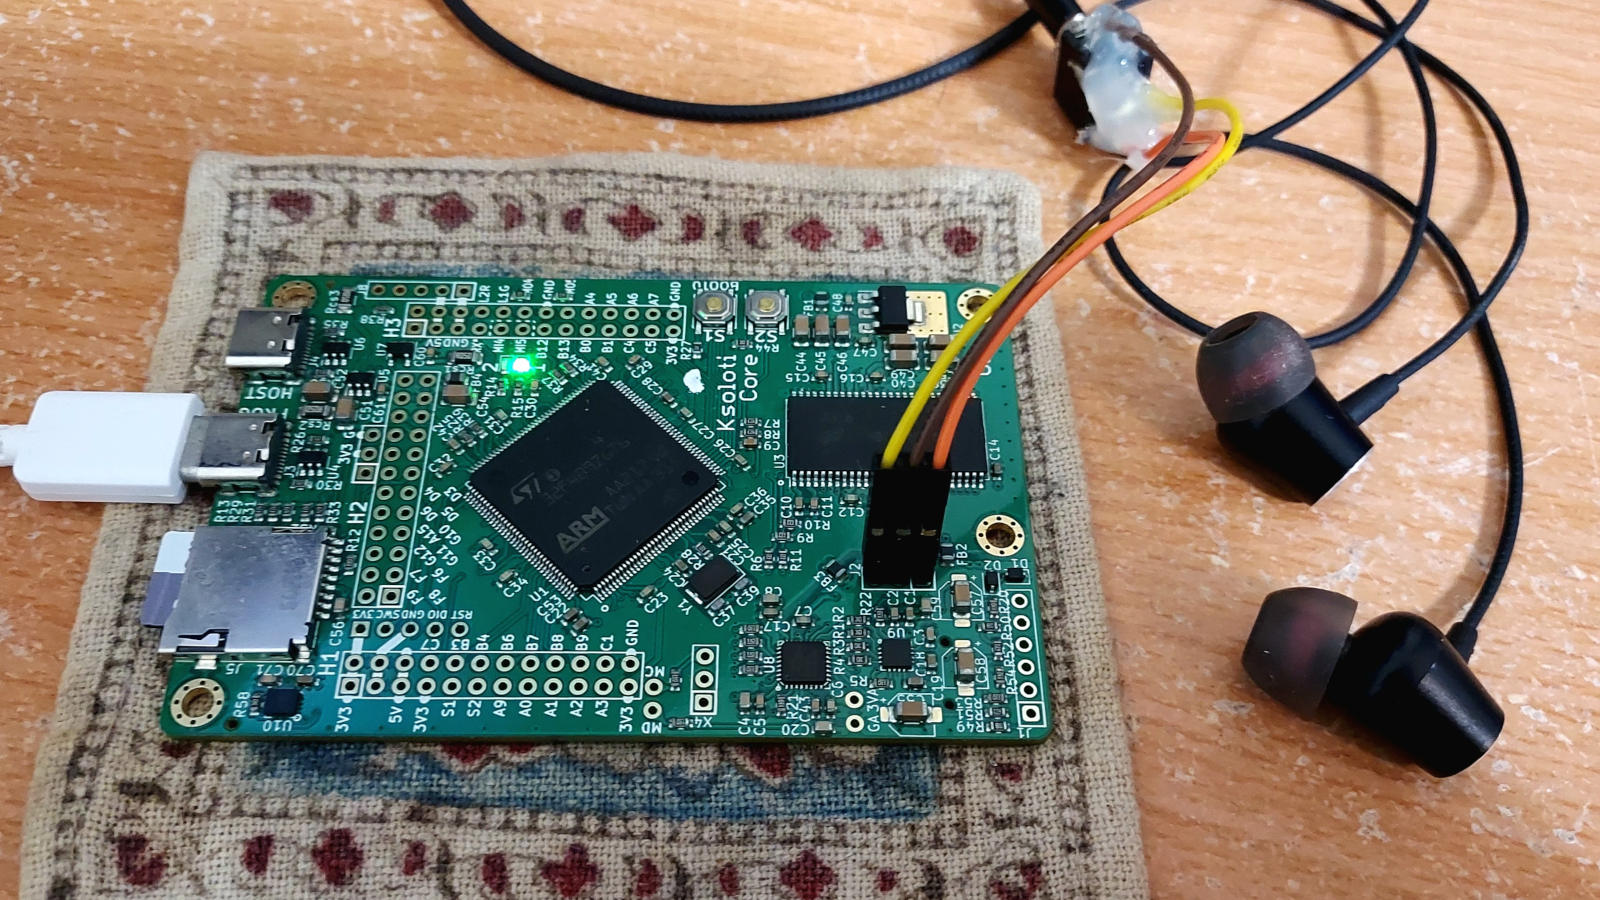
Hacky and minimal Ksoloti hardware setup.
Luckily, the Axoloti Patcher comes with a series of tutorial patches that introduce and showcase its basic usage. Max/MSP and Pure Data users will feel right at home here. Open the File menu and go to Library > factory > tutorials.
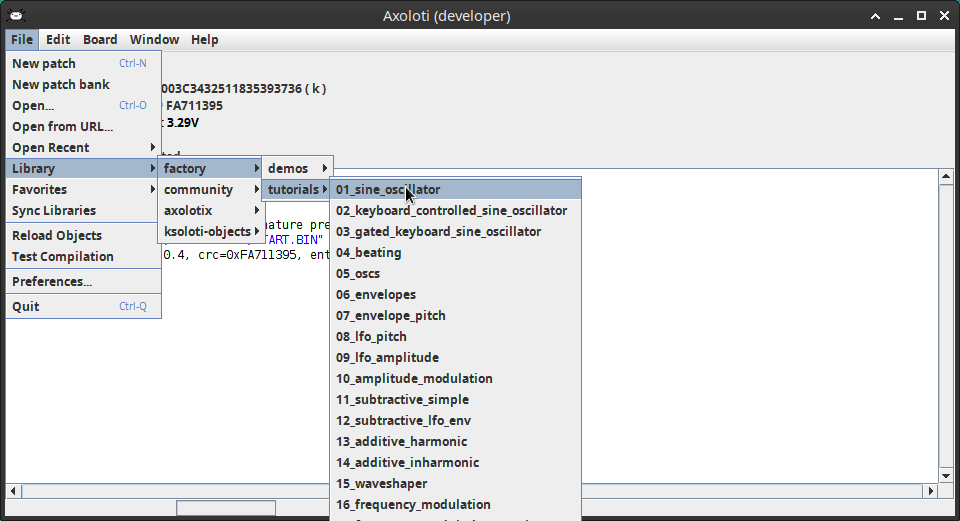
The factory tutorial series.
Open any patch that sounds interesting to you. I am starting with the first patch, 01_sine_oscillator. It is basically a "Hello, World" patch for Axoloti.

01_sine_oscillator.axp
With your Ksoloti connected, check the checkmark at the top left of the window labeled Live, to... well, go live (or press the keyboard shortcut CTRL/CMD + E). The patch canvas will change colors to show it is in locked state. While the object positions, connections, and some attributes will be locked now, you can still turn the knobs, toggle buttons, etc. and hear the changes in real time.
Check out the comments across the canvas to get an idea of what you can do. When you're done, you can click the link object at the bottom right to open the next tutorial, or use the menu to browse through the other tutorials and demos.
When you feel ready, or bored already, let's create a new patch from scratch. Select File > New Patch.
In the blank canvas that is your new patch, hit the Space key (or select Edit > New Object... from the menu). The resulting pop-up window is called the Object Finder window. Type in in the text field and double-click on the object audio/in stereo (or select it and hit Enter).
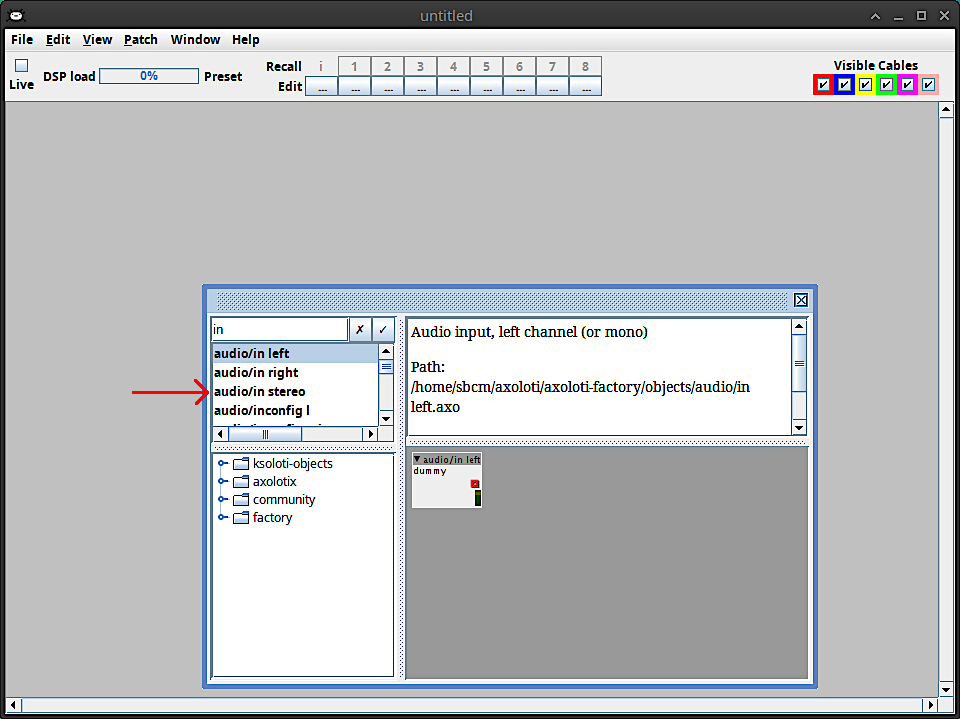
The Object Finder window.
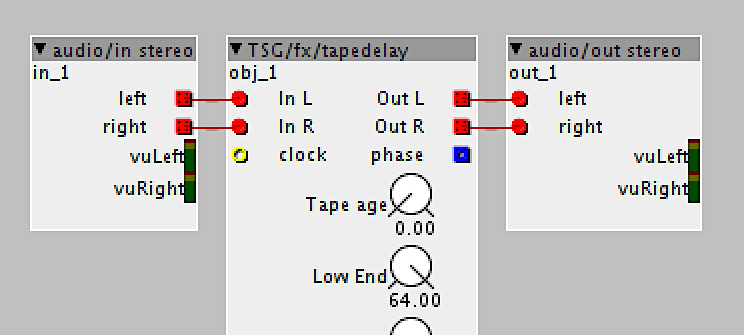
Open the Object Finder window again and type in tape. There should be an object called TSG/fx/tapedelay in the result list. Place it in your patch. Then again, find the object audio/out stereo and place it. Your patch should now look something like this:

Our own tape delay! But you've guessed it. This patch won't make a sound.
Now we make the necessary patch cord connections, just like on a modular synthesizer. Click and drag your mouse cursor from outputs to inputs to pass on the sound.
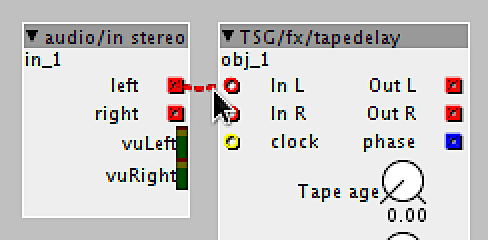
Click and drag to make a connection.
By the way, RED cables and inlets/outlets carry audio signals, BLUE ones carry control signals (like LFOs, ADSR envelopes, or MIDI notes etc.), and YELLOW ones carry logical signals (a special type of control signal that can only be ON or OFF, not in between, for example a trigger or a keyboard key pressed/released event). But there is some freedom when it comes to connecting signals of different types together. You can either convert a signal to the type you need using a dedicated conversion object ("conv/" in the Object Finder) or just drag a cable and see if the inlet in question accepts it. Happy accidents ensue! There are a few more types of signals we aren't mentioning here. They are less common so we don't need to know about them just yet.
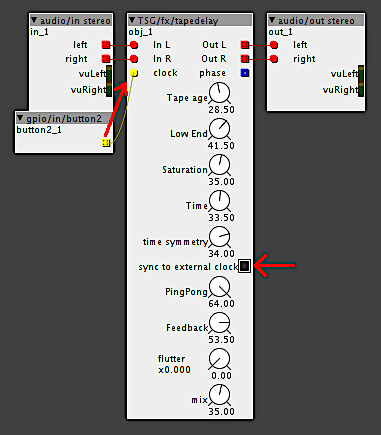
When you're done connecting, it should look something like this:
Our own tape delay!
Go live and feed your Ksoloti an audio signal, either through the fancy input circuitry I just know you've already put together, or simply by touching with your finger the left half of the 6-pin audio header in the bottom left corner of your Ksoloti Core. Tweak the knobs of your TSG/fx/tapedelay and listen to what they do!
Remember the logical signals we briefly mentioned above? It turns out the tapedelay has one inlet of this type labeled clock. As it happens, a button pressed/released signal is a logical on/off signal, so let's add a gpio/in/button2 object and connect it to the clock inlet. Turn on the button sync to external clock to make it react to our button presses.
I *think* we've just added a tap tempo function to our tape delay.
Press S2 on the Ksoloti Core in a steady rhythm to have the tapedelay derive its delay time from it.
Note how you can actually turn this sync function on and off while the patch is live. Nice to have. You could assign a MIDI controller to it and to the knobs then tweak about in real time without even needing your computer. You could right-click on the tapedelay then select edit object definition to find out this tapedelay is actually a patch within a patch. You could then embed the tapedelay object as an independent copy and hack its insides (which could include a way of externally toggling sync, or blue modulation inputs for all its parameters). But these are all stories for another day.
This concludes our random Getting Started guide I really just made up as I went. By calling it "random" I am simply trying to get one point across: the ability to easily do this sort of sketching is an important part of Axoloti. Hopefully this guide showed you how to get around in the Patcher and how to further explore the wealth of objects and patches in the Axoloti ecosystem.